½ cup ferment brine or ½ cup water + ½ teaspoon salt 1 cup brown, red, or black rice (any length grain) 1 cup water ½..." /> ½ cup ferment brine or ½ cup water + ½ teaspoon salt 1 cup brown, red, or black rice (any length grain) 1 cup water ½..." />

Seasoned Brown Rice Free PD Recipe Starring Broth Mix

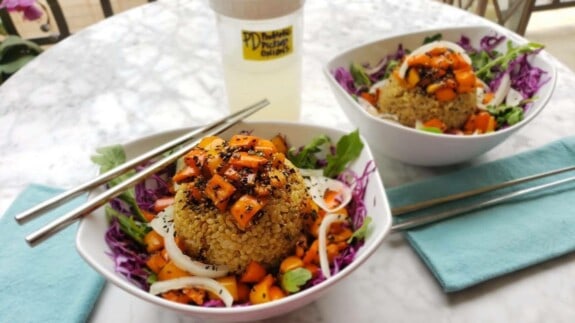
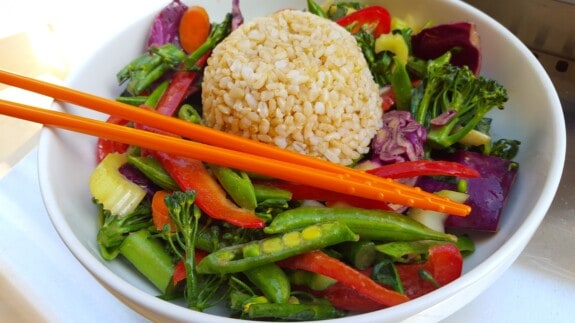
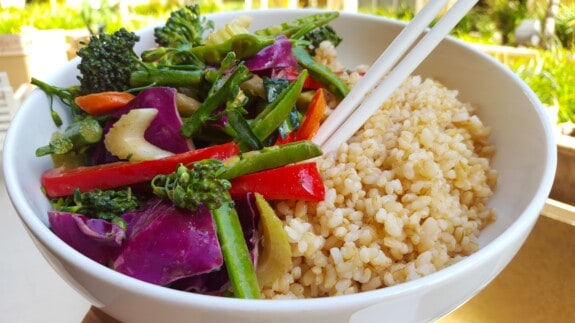
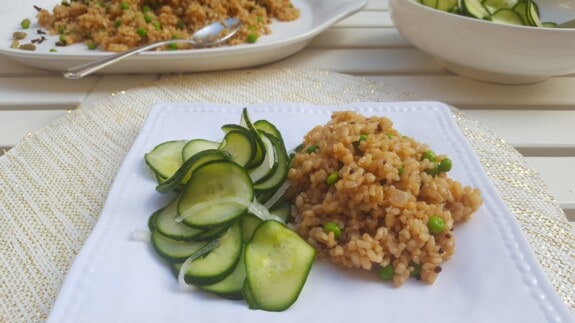
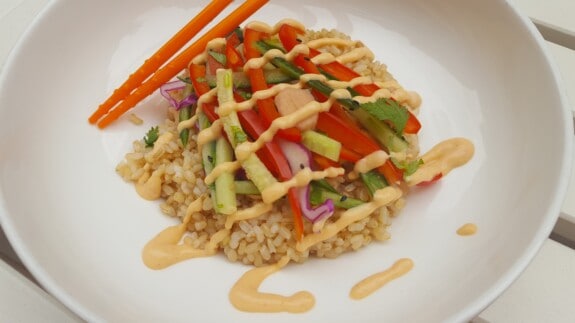
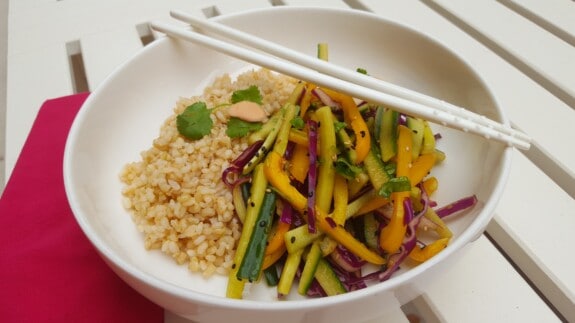
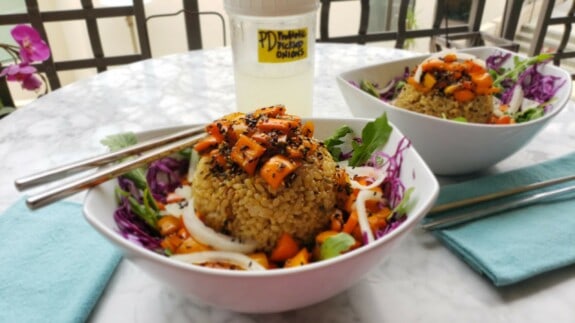
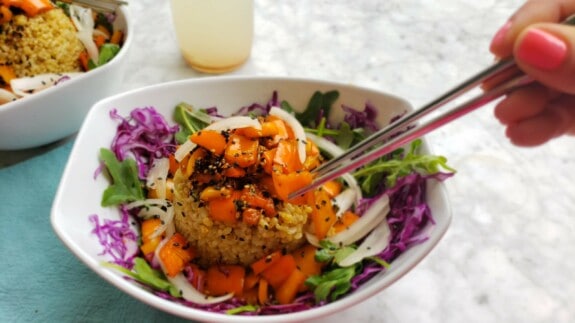
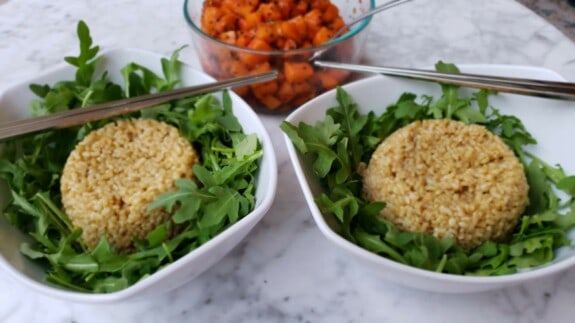
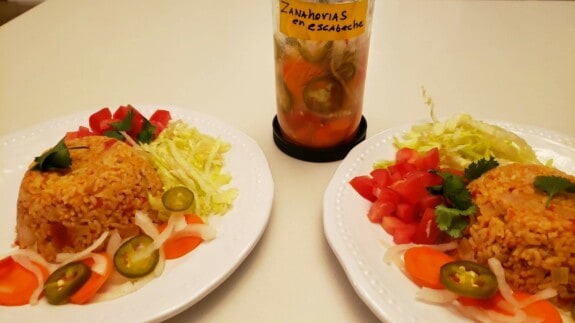
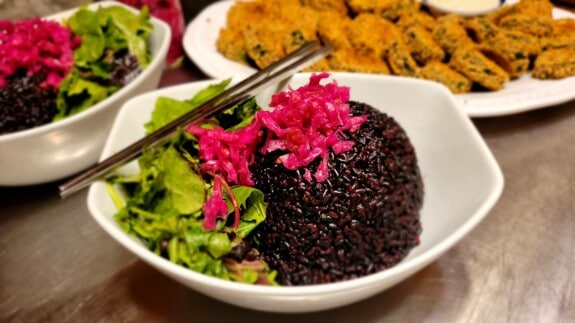
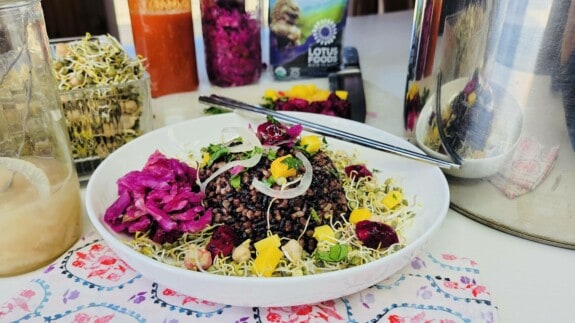
Pack a rice bowl with hot seasoned brown rice and flip it over onto a bowl of well-dressed, oil-free, chopped salad for an exciting 50/50 starch and veggie balanced grain bowl. This hot rice and raw salad combo keeps me warm while enjoying protective slimming salads all winter. Serving suggestions include The Chop Suey Salad, Ah-Ha Poke Bowls, Jerusalem Salad, The Skinny Big Fat Greek Salad, Sushi Roll Bowls, Shanghai Cucumbers, Get Shredded Carrot Salad, and The Cruciferous Chop. Electric pressure cookers like the Instant Pot have made cooking rice easy. On a Protective Diet we adore brown rice‘s nutty aroma and toothsome texture. Our protective gut microbes require fiber and in return reward us with a burst of good-feeling neurotransmitters when choosing whole grains over white. This recipe includes perfect water-to-rice measurements and the cooking time for short, medium, or long-grain brown, red, or black rice; along with encouragement to use the Instant Pot Delay Start feature for a warm rice welcome home after a long day. Read the recipe notes to reduce your batch to one cup or quadruple it for a crowd. Explore colorful rice varieties that include protective anthocyanins and learn how to cook rice perfectly on a stovetop, grill, wood stove, or campfire with this recipe. We are looking forward to enjoying easy delicious and protective meals while having camping fun this summer, and also want to ensure everyone is prepared for any possible power outages this winter.

Electric Pressure-Cooking Seasoned Brown Rice Recipe Ingredients:

Electric Pressure-Cooking Directions:

  1. Read all Directions and Notes
  2. Measure rice into the pressure cooker bowl
  3. Add same measurement of water + plus ½ cup ferment brine or ½ cup water + ½ teaspoon salt
  4. Add 2 teaspoons Plant-Based Broth Mix for every dry cup of rice
  5. Secure lid and close steam valve
  6. Set to cook under high pressure for 22 minutes with quick or natural release (make sure the ‘Keep Warm’ button is off, or manually turn off the pressure cooker when cook time is complete)

Instructions for Instant Pot ‘Delay Start’ feature:

  • Follow the directions above to assemble rice and secure lid with pressure valve closed
  • After setting the cook time immediately press the ‘Delay Start’ button
  • Adjust the number of hours desired to delay the start of rice cooking
  • Turn off the ‘Keep Warm’ button to prevent rice from drying out and burning
  • Rice takes approximately 40 minutes to cook so plan your start time accordingly, (10 to 15 minutes to build pressure, cook for 22, and a few minutes for quick release)
  • If you are setting your rice up at 8:00 am and you’d like to eat dinner at 6:00 pm set your ‘Time Delay Start’ for 9 hours and allow pressure to naturally release, or release manually if you are ready to eat

Pressure Cooking Rice Notes and Pro Tips:

  • ½ cup additional water or ferment brine is needed when cooking whole grain rice in a pressure cooker
  • ½ cup liquid addition stays the same no matter how many cups of rice are cooked
  • Rice can be quick-released after the 22-minute cook time
  • Do not open lid if you are not ready to serve and your rice will remain hot for 30 minutes
  • Turn off the ‘Keep Warm’ function immediately after cook time is completed to prevent cooked rice from drying out or burning

How much Rice Should I make?

  • 1 cup of dry rice makes 2.5 cooked cups rice (I make one cup dry measured when eating alone and 2 cups dry measured when Jerry and I eat together)
  • 2 cups of dry rice makes 5 cups cooked rice
  • 3 cups of dry rice makes 7.5 cups cooked rice
  • 4 cups of dry rice makes 10 cups cooked rice
  • With a rice recipe this easy I do not recommend batch cooking rice in advance and reheating
  • Honor yourself and your family with freshly cooked rice
  • Explore the rice recipe category for exciting ways to enjoy rice on a Protective Diet

Brown, Red, or Black Rice
When we choose brown, red, or black rice we are choosing the most protective rice because it contains the fibrous bran. The outer hull of all rice is always removed before it is consumed. Brown, red, and black rice always include the bran layer. White rice has the hull and bran removed leaving just the white endosperm. The hull has a nutty flavor, a toothsome texture, and offers our protective gut microbes the fiber they need to thrive. In return, those resident microbes produce anti-inflammatory short chain fatty acids and neurotransmitters to make us feel good and satisfied, as well as protect us from disease. This is why we feel great consuming less volume when we eat high-fiber plant foods every day. Rice comes in several lengths and styles. Have fun finding your favorite. Forbidden black rice is one of my favorites to add to short grain brown rice. It adds protective anthocyanins and additional eye appeal next to brightly colored Red Lentil Dahl decorated with ferments. Wild rice is harvested from the genus Zizania of grasses and requires a longer cook time than rice. It is very fibrous, high in protein, and not typically served in volume like rice.

Stovetop, Grill or Campfire Seasoned Brown Rice Recipe Ingredients:

Stovetop, Grill, Wood Stove, and Campfire Directions:

  1. Measure rice into an appropriate size saucepan (rice will expand 2.5 times its size)
  2. Add double that amount of water into pan
  3. Add 2 teaspoons Plant-Based Broth Mix for every cup of rice
  4. Add the additional ½ cup ferment brine or ½ cup water + ½ teaspoon salt
  5. Turn heat on high and bring uncovered rice and water to a boil
  6. As soon as water comes to a rolling boil cover with a tight-fitting lid
  7. Immediately turn down heat to the lowest flame or move higher on the campfire (to a cooler spot), and simmer with the lid on for 30 minutes
  8. Set a timer for 30 minutes
  9. After 30 minutes, remove from heat and allow the rice to sit with the lid on for an additional 20 minutes

Stovetop, Grill, Wood Stove, and Campfire Notes & Pro Tips:

  • We are looking forward to enjoying easy delicious and protective meals while having camping fun this summer, and also want to ensure everyone is prepared for any possible power outages this winter
  • 2 cups of dried rice makes 5 cups of cooked rice; use an adequate sized saucepan or Dutch oven
  • When the water and rice come to a boil cover pot with lid and move to a new burner, or allow grill to cool down to low, or move to a higher spot on the fire for the lowest heat setting and continue cooking over low for an additional 30 minutes
  • Any stainless or metal pan without plastic or silicone handles can be used on an outdoor gas or charcoal grill or on a rack placed over an open fire
  • I only recommend making rice on a grill or fire pit while camping or during emergencies and power outages
  • I will enjoy making it over an open fire during the annual Christensen Family Camping trip served under Stove Top Red Lentil Chili or Busy Day Chili
Share with your friends

Responses

Share to...